
Disclosure: Some of the links you’ll encounter are affiliate links. If you click and buy something, I’ll get a commission. If you’re reading a review of some precious metals company, please understand that some of the links are affiliate links that help me pay my bills and write about what I love with no extra cost to you. Thank you!
Table of Contents
How to Integrate Payment Solutions Seamlessly in Your Mobile App
Incorporating a payment solution into your mobile app? This is a great way to improve your customers’ buying experience. It allows them to shop and check out without leaving your app. This creates seamless transactions.
In this article, we’ll discuss how to integrate a payment solution into your mobile app. We’ll also review why you’d want to integrate a payment solution into your app in the first place.
Why Integrate a Payment Solution into Your App?
Integrating a payment processing tool directly into your mobile app enables customers to make purchases without leaving your platform. Opting for a third-party payment integration from a reliable provider rather than building your own checkout experiences gives you access to well-established partnerships with major financial institutions.
Plus, integrating payment solutions seamlessly into your mobile app can also serve as a cost-reduction strategy by:
- Minimizing transaction fees
- Reducing manual reconciliation work
- Streamlining financial operations.
Choosing a payment gateway with competitive pricing and automation features can be beneficial. It helps lower operational costs while improving efficiency and overall payment experience.
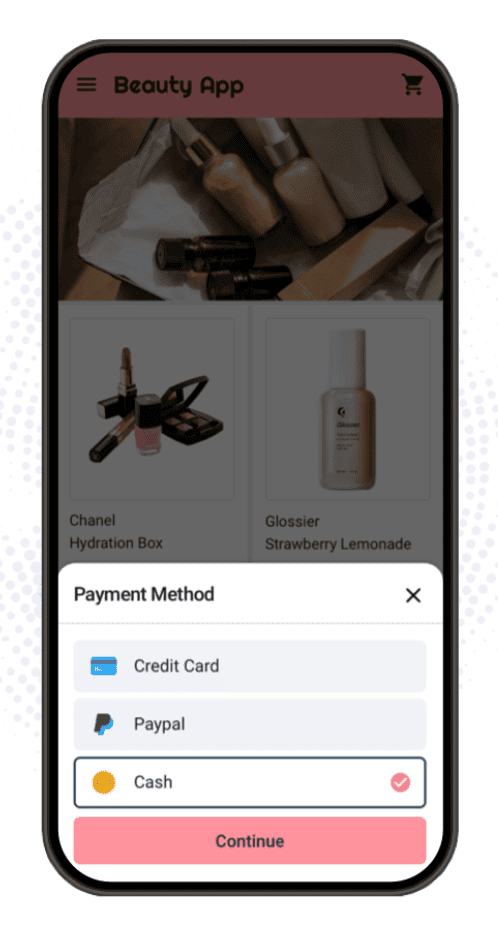
Additionally, integrating a system that supports multiple payment methods reduces friction for users. This leads to higher conversion rates and fewer abandoned transactions.
For example, a 2023 study by the Baymard Institute found that 11 % of shoppers abandoned a checkout because their preferred payment option wasn’t offered.
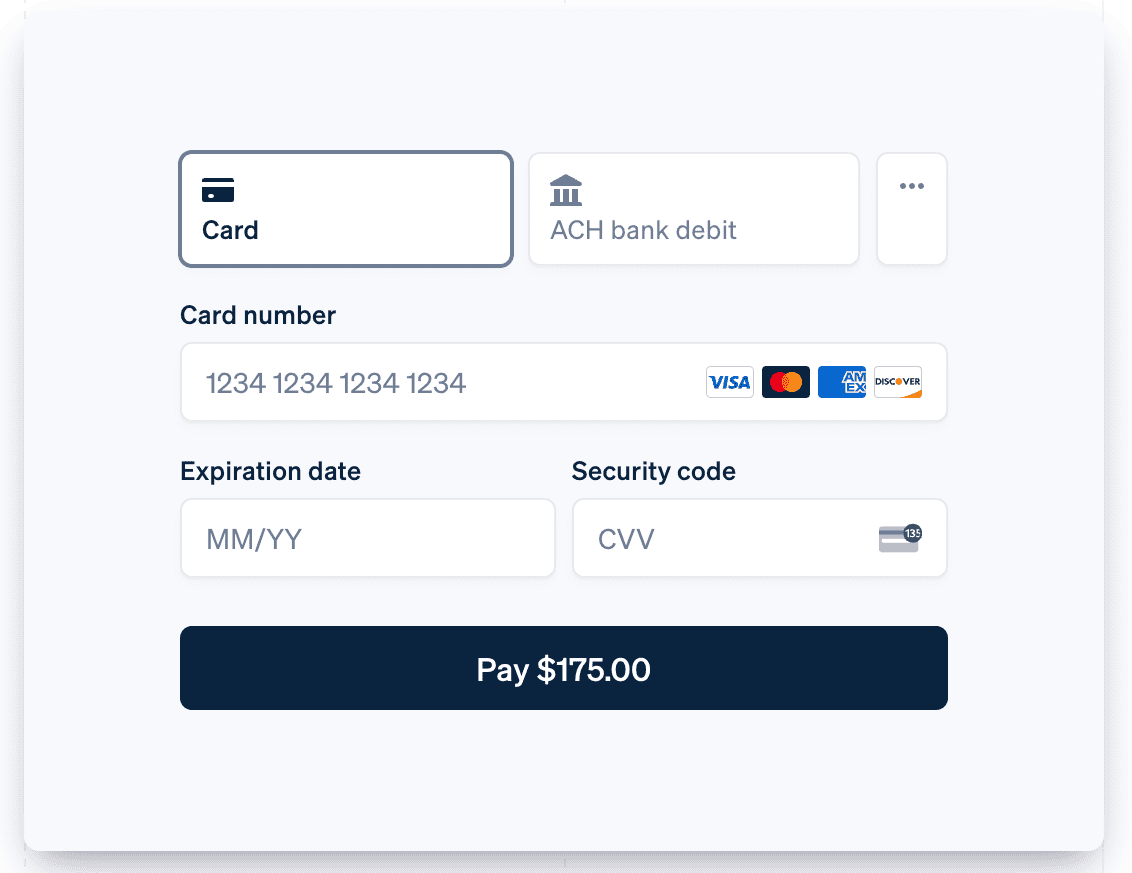
You should also accept credit card payments and debit cards.
Depending on your business type, you can accept bank transfers and mobile payments from third-party platforms like Shop, PayPal, Stripe, or Venmo. Supporting these methods aligns with PCI DSS and Payment Card Industry standards for payment security. This helps reduce fraud losses.
How to Integrate a Payment Solution into Your App
Now that you understand what benefits come with integrating digital payments into your app, let’s break down the steps to make this happen.
1. Identify Your Needs
The first step to implementing a payment solution in your mobile app is to get clear on how you need this workflow to serve you. Break down the payment products and features you’re looking for. These can include AI-based fraud management, 24/7 support, and multi-user access.
You should also map out your technical requirements and what software and gateway solutions make sense in your tech stack. Think about where your customers are from and what payment methods you’ll need to support to make the buying process accessible to them.
As part of this process, determine your budget. These advanced payment solutions are often available as monthly or annual subscriptions. Providers also charge a processing fee on every transaction. This is either a flat fee or a percentage of the total.
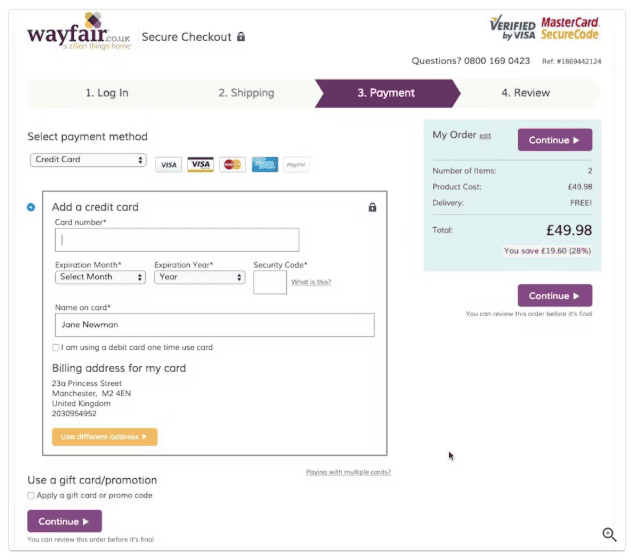
2. Choose Your Payment Solution
Next, choose the right merchant or credit card processor. Look for a solution that supports different payment methods, handles credit card processing, and integrates with your financial infrastructure for global commerce.
Users who feel safe entering their details are more likely to complete purchases without second-guessing, so security is another crucial consideration when choosing a payment solution. This is where cloud-native security tools help. They monitor and defend against threats without slowing things down.
You’ll also need to consider the costs of the solutions you compare. Look for solutions that offer the functionality you need on a plan within your budget—factor in any additional fees or usage costs.
3. Create a Profile
Once you’ve chosen a payment processing platform, you’ll need to create a profile. On most platforms, you’ll either start by signing up for a free trial or requesting a demo, allowing you to determine which pricing plan best suits your needs. And if you’re managing several demo requests or onboarding calls during this process, a lead-routing scheduler like Inleado can automatically book each meeting with the right team member, saving time and reducing manual follow-ups.
After you’ve committed to the platform and purchased your plan, you’ll need to configure your profile settings. Set up your account preferences and add any extra users who need access to the platform.
4. Access the API
Now, it’s time to access your payment processing platform’s API credentials. A good provider will have comprehensive technical documentation to walk you through accessing its API credentials.
If you choose an app builder with built-in payment processing, you can skip this step and the next one.
5. Implement the API
Once you’ve accessed the API credentials for your chosen payment processing solution, you’ll implement the API into the platform where your app is hosted.
For some platforms, this is a simple copy and paste. For others, you must provide login credentials to connect the two tools. If the platforms have an existing partnership, it may be as easy as toggling the integration “on.”
Again, since this part of the process depends on the specific tools you’re using, you should look to the platform-specific documentation for this step before implementing a sales API.
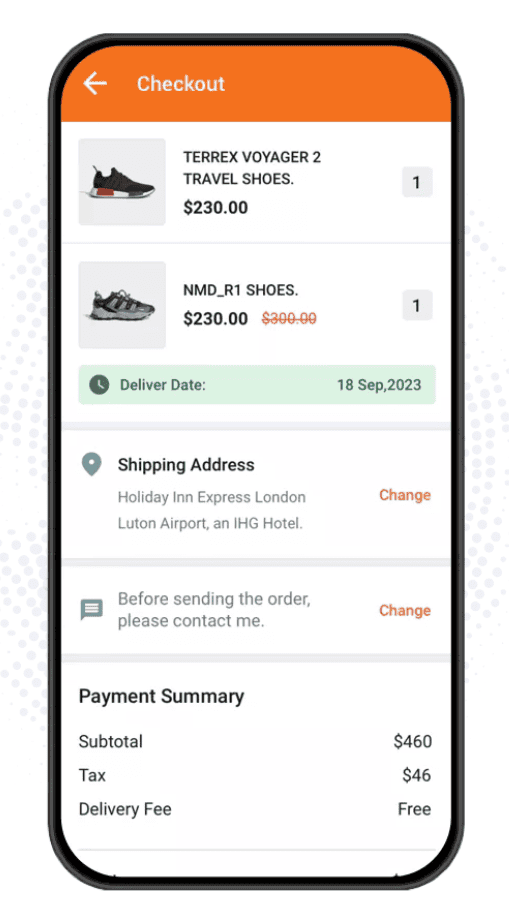
6. Configure Your Checkout Preferences
Once the payment solutions are integrated into your app builder, it’s time to set up your checkout preferences. This is where you’ll add accepted payment methods, shipping fees, and other relevant details.
You should also jot down what sort of copy you’ll use on your checkout pages so you can implement it as necessary.
7. Test the Workflow
Before launching your in-app payment process, the last step is to test the workflow. This allows you to identify any snags in the workflow.
Test the checkout flow with a couple of different items. If there are different varieties of a specific item, test that functionality, too. Ensure the system works as intended for the customer and on the backend.
Final Thoughts
Creating an in-app payment process is a great way to streamline your customers’ buying experience. With the right tools, you can integrate a payment solution that enables secure, seamless in-app purchasing and boosts customer satisfaction.
Want to dive deeper into digital payment strategies and mobile app development? Visit Nikola Roza’s blog for more insights, guides, and actionable tips to help you grow your online business effectively.
About the Author
Emily Krings is an SEO content writer and strategist with a knack for storytelling. She specializes in helping B2B businesses create blog content that connects with their audiences.
LinkedIn | Twitter | Website | Headshot
Nikola Roza
Nikola Roza is a blogger behind Nikola Roza- SEO for the Poor and Determined. He writes for bloggers who don't have huge marketing budget but still want to succeed. Nikola is passionate about precious metals IRAs and how to invest in gold and silver for a safer financial future. Learn about Nikola here.